

How to Start Cold Water Immersion at Home in 2026
Table of Contents
- What You'll Need Before Your First Cold Plunge
- Step-by-Step: How to Start Cold Water Immersion at Home
- How Long to Stay in an Ice Bath as a Beginner
- Cold Water Immersion Safety Tips You Should Not Skip
- Your Physiological Adaptation Timeline: Weeks 1 to 12
- Budget-Friendly DIY Setups vs. Professional Grade Ice Bath for Sale
- Frequently Asked Questions
Last Updated: September 22, 2026
What You'll Need Before Your First Cold Plunge
Starting cold water immersion at home takes less gear than most people think. The basics are simple: a tub, cold water, and a way to track time.
Here's your starter checklist:
- A cold plunge tub or deep container
- A thermometer to check water temperature
- A timer or stopwatch
- Warm, dry clothes and a towel within arm's reach
- A safe, drainable spot to set up
For a permanent home setup, a chiller keeps water at a steady temperature so you're not hauling ice every day. Thermo Plunge Recovery Systems builds recovery gear for exactly this kind of home setup, and their water chiller holds water at a consistent 39°F.

The one thing people forget? A plan for getting out. Keep your exit path clear and your warm layer close. That detail matters more than any gadget.
Step-by-Step: How to Start Cold Water Immersion at Home
Cold water immersion is the practice of submerging your body in cold water to support recovery, circulation, and mental resilience. The method matters as much as the water.
Follow these three steps in order. Rushing any of them is where beginners get into trouble.
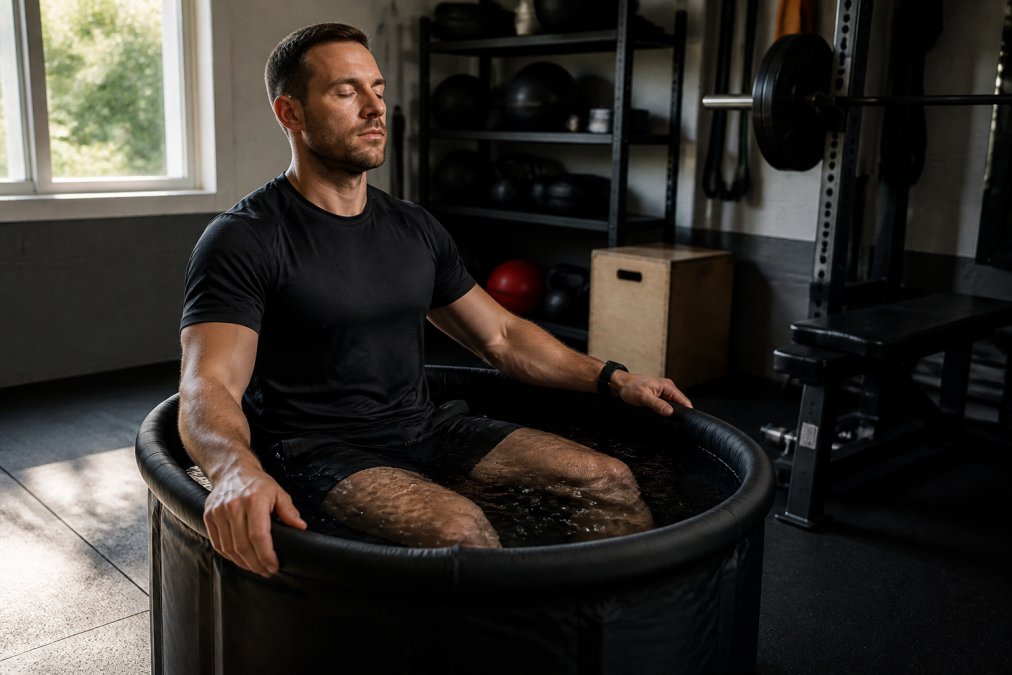
Step 1: Set Your Water Temperature and Fill Your Tub
Beginners should start between 50°F and 59°F, not at the near-freezing temps you see online. Colder is not better when you're new.
Fill your tub, then check the water with a thermometer. If you're using ice, add it gradually and stir. Aim for even temperature, not a pocket of freezing water at the bottom.
A common mistake is going straight for 39°F on day one. That's an advanced target. Work toward it over weeks, not minutes.
Step 2: Control Your Breathing Before You Submerge
Your breathing is the difference between a calm plunge and a panic.
The cold shock response hits fast. Your heart rate spikes, you gasp, and your body wants out. Controlled breathing blunts that reaction.
Try this before you step in:
- Take slow breaths in through your nose
- Exhale longer than you inhale
- Focus on a fixed point ahead of you
Box breathing works well here: inhale for four counts, hold for four, exhale for four, hold for four. Repeat until your pulse settles.
Step 3: Enter Slowly and Stay for the Right Duration
Lower yourself in feet first. Keep your hands at your sides or on the tub edge.
Once your shoulders are under, stay still. Thrashing speeds up heat loss and raises your risk.
Ice Bath Tub – Portable Cold Plunge for →
Set your timer before you get in. Beginners should aim for 30 to 60 seconds per session.
How Long to Stay in an Ice Bath as a Beginner
For most beginners, 30 to 60 seconds is plenty. Build toward two to three minutes over several weeks.
Longer is not the goal. Consistency is.
Watch for these signs that it's time to get out:
- Shivering you can't control
- Numbness in your fingers or toes
- Confusion or dizziness
- Skin turning white or blue
If any of those show up, you're done. Get out and warm up.
A useful rule: stop while you still feel in control. Pushing past that point is how people end up with afterdrop, the continued drop in core body temperature that happens after you exit the water.
Cold Water Immersion Safety Tips You Should Not Skip
Safety comes down to three things: never go alone, never push past your limits, and always have a warm-up plan. But the details matter, especially if you have an underlying condition.
Never plunge alone. If something goes wrong in cold water, you may not be able to help yourself. Have a buddy watch you, or at minimum keep a phone within reach and tell someone you're getting in.
Keep sessions short. Cold water pulls heat from your body fast, and hypothermia prevention depends on limiting exposure. Beginners should cap sessions at 30 to 60 seconds.
Warm up properly afterward. Dry off, dress in warm layers, and let your body temperature come back on its own. A hot shower right away can worsen afterdrop, the continued drop in core body temperature that happens after you exit the water.
Who Should Avoid Cold Plunging
Cold water immersion is not safe for everyone. Talk to a doctor first if you have any of these conditions:
- Heart conditions or high blood pressure. Cold water causes a sudden spike in heart rate and blood pressure. If you have coronary artery disease, arrhythmias, or uncontrolled hypertension, this response can be dangerous.
- Circulation problems. Raynaud's syndrome, peripheral artery disease, or a history of blood clots can make cold exposure risky. Your extremities may not recover normal blood flow quickly.
- A history of seizures. The cold shock response can trigger seizures in people with epilepsy or other seizure disorders.
- Pregnancy. Cold water immersion can cause vasoconstriction and raise stress hormones, which may affect both mother and baby.
- Diabetes with neuropathy. If you have reduced sensation in your feet or hands, you may not feel warning signs like numbness or skin damage.
- Cold agglutinin disease or cryoglobulinemia. These rare blood conditions cause red blood cells or proteins to clump in cold temperatures.
If you're unsure, get medical clearance before your first plunge. No recovery benefit is worth a cardiac event.
Your Physiological Adaptation Timeline: Weeks 1 to 12
Your body adapts to cold water in stages. Knowing the timeline helps you set realistic expectations.
Weeks 1 to 2: Every plunge feels brutal. Your cold shock response is at full strength.
Weeks 3 to 4: Breathing gets easier. You start to control the gasp reflex.
Ice Bath Tub – Portable Cold Plunge for →
Weeks 5 to 8: Cold tolerance improves. You can stay in longer without shivering.
Weeks 9 to 12: Acclimatization kicks in. The same temperature feels noticeably less intense.
This timeline assumes you plunge a few times a week. Skip weeks and you lose ground.
Budget-Friendly DIY Setups vs. Professional Grade Ice Bath for Sale
You can start cold water immersion at home for very little, or invest in gear that removes the daily hassle. Both paths work, but the DIY route has more variables to get right.
Budget-Friendly DIY Setups
A DIY setup is the cheapest entry point. Here are three common approaches, from simplest to most involved:
1. Stock tank + ice A galvanized steel stock tank (often sold at farm supply stores) holds 50 to 100 gallons. Fill it with cold tap water, add 10 to 20 pounds of ice, and stir. The trade-off: no temperature control, and you'll need a drain hose or a pump to empty it. Cost is low, but daily ice runs add up.
2. Chest freezer conversion A used chest freezer can be sealed with food-grade epoxy and fitted with an external thermostat to hold water at a steady temperature. This is the most popular DIY chiller alternative. You'll need to unplug it before getting in, and you must ensure the thermostat overrides the freezer's built-in controls. Safety note: never leave a converted freezer plugged in while you're inside it.
3. Portable tub + ice A foldable, multi-layered portable tub is easy to store and move. Pair it with ice and a thermometer. It's less durable than a stock tank but works for occasional plunges.

Professional Grade Ice Bath for Sale
A professional-grade ice bath for sale gives you consistent cold without the ice. A chiller holds your target temperature around the clock, often with a built-in filter and timer.
| Setup | Upfront Cost | Daily Effort | Temperature Control |
|---|---|---|---|
| DIY stock tank + ice | Low | High | None |
| Chest freezer conversion | Medium | Low | Consistent (with thermostat) |
| Portable tub + ice | Low | High | None |
| Tub + water chiller | Higher | Low | Consistent |
Thermo Plunge Recovery Systems makes both ends of this range.
Frequently Asked Questions
How long should a beginner stay in an ice bath?
Start with 30 to 60 seconds at 50 to 59°F, then add 15 to 30 seconds per session over two to three weeks. Most beginners reach 2 to 3 minutes at 45 to 50°F within a month. Stop immediately if you feel numbness, dizziness, or uncontrollable shivering. A timer removes guesswork and keeps early sessions from turning into a test of willpower.
What is the recommended temperature for cold water immersion?
Beginners should begin at 50 to 59°F. Once your cold shock response settles, move toward 45 to 50°F for recovery work. Water below 45°F raises hypothermia risk and shortens safe immersion duration. A water chiller that cools to 39°F gives you precise control, but you do not need to start that cold. Consistency at a moderate temperature beats occasional extreme plunges.
Is it safe to do cold water immersion every day?
Daily sessions of 2 to 3 minutes at 45 to 59°F are generally well tolerated by healthy adults. Watch for signs of accumulated thermal stress: poor sleep, lingering shivering, or rising resting heart rate. Some athletes alternate days to support post-exercise recovery and adaptation. If you have a heart condition, Raynaud's, or uncontrolled blood pressure, get medical clearance before starting a daily routine.
Do I need professional equipment to start cold water immersion?
No. A stock tank, a portable tub, and bagged ice will get you started for well under a hundred dollars. What professional gear adds is temperature stability, filtration, and a thermal lid that keeps water cold between sessions. If you plan to plunge four or more times a week, a chiller-compatible tub and a 1/3 HP water chiller cut the daily ice runs and make the habit far easier to keep.