

How to Build an Infrared Sauna Home Sanctuary
Table of Contents
- Planning Your Infrared Sauna Home Sanctuary
- Selecting Materials and Wood for Your Build
- Framing, Insulation, and Interior Finishing
- Infrared Heater Panels: Types, Placement, and Wattage
- Infrared Sauna Electrical Requirements and Safety
- Infrared Sauna Ventilation and Moisture Management
- Home Sauna Safety, Testing, and Commissioning
- Maintenance, Operating Costs, and Long-Term Care
- Frequently Asked Questions
Last Updated: October 8, 2026
Planning Your Infrared Sauna Home Sanctuary
Building an infrared sauna home sanctuary transforms your wellness routine. Unlike traditional saunas that heat the air around you, infrared heat penetrates directly into your body, promoting detoxification, muscle recovery, and stress relief. At Thermo Plunge Recovery Systems, we help athletes and wellness enthusiasts create dedicated recovery spaces that deliver professional-grade results without leaving home.

The journey from concept to completed sauna starts with clear planning. You need to know your space, your budget, and whether you'll build from scratch or use a prefabricated kit. Getting these decisions right prevents costly mistakes later.
Choosing Your Space and Dimensions
Your available space determines everything else. Most home saunas range from compact one-person models (roughly 3 feet by 3 feet) to spacious two-person units (4 feet by 6 feet). Measure your target room carefully, including ceiling height.
Ceiling height matters more than most people realize. You need at least 6 feet 8 inches of clearance so you can sit comfortably on the bench without your head touching the roof. Standard sauna benches sit about 18 inches off the floor, so plan accordingly.
Consider these space factors:
- Dedicated room versus shared space (bedroom, basement corner, garage)
- Electrical outlet proximity (you'll need dedicated circuits)
- Ventilation access (windows, exterior walls, or HVAC integration)
- Door swing clearance (typically 24-32 inches)
- Heat dissipation around the unit (at least 6 inches clearance on all sides)
A 2-person sauna like the Infrared Sauna - 2-Person Premium Home Spa measures 47.2 inches long by 34.2 inches wide by 70.9 inches tall. That's roughly a 4-by-3-foot footprint, fitting into most bedrooms or basements.
DIY Build vs. Prefabricated Sauna Kit
You have two paths: build from raw materials or assemble a prefabricated kit.
Prefabricated kits arrive with pre-cut wood panels, pre-wired heaters, and detailed assembly instructions. Assembly typically takes 4-8 hours. Kits eliminate guesswork on wood selection, electrical safety, and heater placement. They cost more upfront but deliver reliability and warranty support.
DIY builds from raw lumber give you complete control over design, wood type, and dimensions. You source everything separately: framing lumber, insulation, interior cladding, heater panels, and electrical components. This path requires carpentry skills, electrical knowledge, and careful planning. It takes significantly longer, often 40-80 hours, but can cost less if you source materials strategically.
Most first-time builders choose kits. They eliminate the learning curve and reduce the risk of costly errors in electrical wiring or heater installation.
Selecting Materials and Wood for Your Build
Wood selection affects heat retention, durability, and the sauna experience itself.
Hemlock is the industry standard. It resists moisture, doesn't absorb excessive heat, and stays cool to the touch on the exterior. Hemlock also resists rot and insect damage better than softer woods.
Cedar offers natural antimicrobial properties and a pleasant aroma. It's softer than hemlock, so it requires more maintenance but delivers a luxurious feel. Cedar works well for interior cladding or accent walls.
Spruce and pine are budget-friendly but less durable in humid environments. They absorb moisture more readily and can warp or develop mould over time.
For framing (the hidden structure), use pressure-treated lumber rated for moisture exposure. For interior surfaces that users touch, avoid pressure-treated wood, use untreated hemlock or cedar.
Wood selection checklist:
- Exterior walls: hemlock or spruce (moisture-resistant)
- Interior benches: hemlock or cedar (comfort and durability)
- Framing: pressure-treated lumber (structural integrity)
- Avoid: soft woods like pine for high-moisture areas
Framing, Insulation, and Interior Finishing
Proper framing creates a structurally sound box that contains heat and moisture.
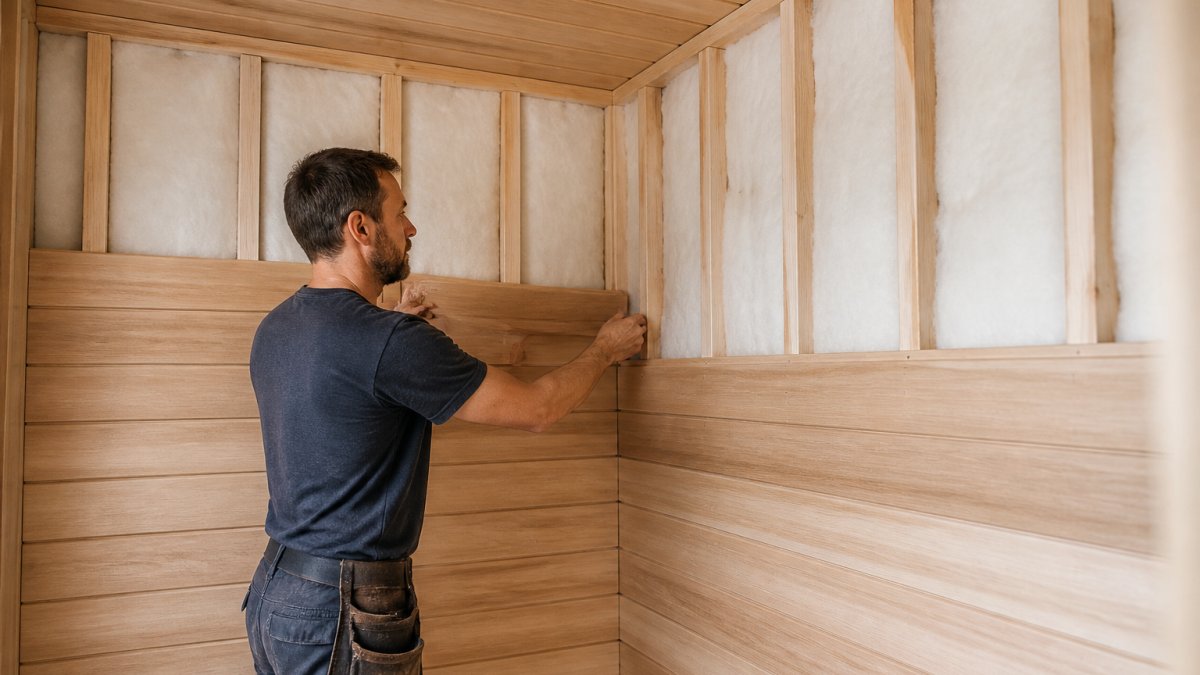
Start with a level floor. Use pressure-treated 2x4 lumber for the base frame, spacing studs 16 inches apart. This spacing supports standard insulation widths and wall panels.
Insulation keeps heat inside and protects your home's exterior walls. Use 3.5-inch fiberglass or mineral wool batts rated for high-temperature environments.
Install insulation between the studs, then cover with a moisture barrier (6-mil polyethylene sheeting).
Infrared Sauna – 2-Person Premium Home Spa →
Interior finishing involves cladding the insulation with wood panels. Hemlock or cedar boards create the finished look and provide the thermal mass that helps maintain temperature stability.
Bench construction matters for comfort and safety. Benches should be 18 inches high and 24 inches deep. Space bench boards 1/4 inch apart to allow moisture drainage.
Infrared Heater Panels: Types, Placement, and Wattage
Infrared heater panels are the heart of your sauna.
Far-infrared panels emit longer wavelengths that penetrate deeper into the body. They're the most common choice for home saunas and deliver excellent detoxification and muscle recovery benefits.
Near-infrared panels emit shorter wavelengths that affect skin and shallow tissue. Many saunas combine both types for comprehensive coverage.
Wattage depends on your sauna volume. A general guideline is 50-100 watts per cubic foot of space.
Panel placement affects heat distribution:
- Back wall: main heating panels (typically 60-70% of total wattage)
- Side walls: supplementary panels (20-30% of wattage)
- Floor: optional foot warmer panels (5-10% of wattage)
Position panels at least 12 inches away from seating areas to prevent burns. Install them securely to studs or backing boards.
Temperature control uses a thermostat that monitors cabin temperature and cycles heater power on and off. Most home saunas operate between 120°F and 160°F.
Infrared Sauna Electrical Requirements and Safety
This is where mistakes become dangerous. Improper electrical installation causes fires, electrocution, and equipment failure.
Most home saunas require 240-volt power, similar to an electric dryer or range. Some smaller units run on standard 110-volt circuits, but they heat more slowly. A 240-volt dedicated circuit is safer and more efficient.
Electrical requirements checklist:
- Dedicated 40-50 amp circuit breaker (do not share with other appliances)
- 10-gauge or 8-gauge copper wiring (depends on circuit amperage and distance)
- GFCI (ground fault circuit interrupter) protection to prevent shock hazards
- Proper conduit or cable protection from the breaker box to the sauna
- Licensed electrician installation strongly recommended
Never run a sauna on an extension cord or shared circuit. The continuous current draw will overheat shared wiring and create fire risk.
According to the National Electrical Code (NEC) guidelines, all circuits in wet or damp locations require GFCI protection. A sauna qualifies as a damp location due to moisture and heat.
Have your installation inspected by a local electrical inspector before powering on. Most jurisdictions require inspection for any new 240-volt circuit. This ensures your installation meets current code and protects your home.
Infrared Sauna Ventilation and Moisture Management
Heat and moisture must escape, or your sauna becomes uncomfortable and your home develops water damage.
Ventilation strategy:
- Air intake: low opening (near floor level) for fresh air entry
- Air exhaust: high opening (near ceiling) for hot, humid air exit
- Passive ventilation: natural convection (warm air rises and escapes)
- Active ventilation: small exhaust fan pulling humid air out
For passive ventilation, install a 4-6 inch intake vent near the floor on one wall and a matching exhaust vent near the ceiling on another wall. Position them diagonally opposite for best air circulation. This creates a natural convection loop.
For active ventilation, add a small bathroom exhaust fan (50-80 CFM rating) to the high vent. Run it during and for 15 minutes after each session. This removes moisture faster and prevents buildup.
Infrared Sauna – 2-Person Premium Home Spa →
Moisture management:
- Wipe down benches and walls after each session
- Leave the door open for 30 minutes post-session to allow evaporation
- Install a humidity monitor to track moisture levels (aim for 40-60% relative humidity)
- Consider a small dehumidifier if your sauna space stays above 70% humidity
Poor ventilation leads to mould growth, wood rot, and respiratory irritation. Proper airflow keeps your sauna healthy and your home protected.
The CDC guidance on indoor humidity and health recommends maintaining indoor humidity between 30-50% to prevent mould and dust mites.
Home Sauna Safety, Testing, and Commissioning
Before your first session, test every system thoroughly.
Pre-operation checklist:
- All electrical connections are tight and secure
- Heater panels emit even warmth with no cold spots
- Thermostat responds correctly to temperature changes
- Ventilation fans operate smoothly
- Door seals properly and opens easily
- Benches are sturdy and splinter-free
- Emergency exit is clear and accessible
- First aid kit is nearby
Run a test cycle at low temperature (100°F) for 15 minutes. Check for unusual sounds, smells, or electrical buzzing. Gradually increase temperature over several sessions while monitoring performance.
Session safety guidelines:
- Start with 15-20 minute sessions at 130°F
- Never exceed 160°F for extended periods
- Stay hydrated before, during, and after sessions
- Exit immediately if you feel dizzy or unwell
- Never use alone during your first few sessions
- Avoid sauna use if you have uncontrolled high blood pressure or heart conditions
According to research on sauna use and cardiovascular health, most people can safely use saunas when they follow proper protocols and stay well-hydrated.
Maintenance, Operating Costs, and Long-Term Care
A well-maintained sauna lasts 15-20 years. Neglected saunas fail much sooner.
Monthly maintenance:
- Wipe interior surfaces with a dry cloth after each use
- Check door seals for gaps or deterioration
- Verify thermostat accuracy with a separate thermometer
- Inspect heater panels for visible damage
Annual maintenance:
- Deep clean all wood surfaces with a damp cloth
- Test all electrical connections for corrosion
- Replace air filters if your ventilation system uses them
- Inspect insulation for moisture or compression (visible through any access panels)
- Service the thermostat if it drifts more than 5°F from actual temperature
Operating costs depend on usage frequency and local electricity rates. A typical 2-person sauna running 3 times weekly costs about 10-15 dollars per month in electricity. More frequent use increases costs proportionally.
For ongoing support and premium equipment, Thermo Plunge Recovery Systems offers professional-grade infrared saunas with 24/7 support and a 30-day guarantee.
Wood conditioning extends sauna life. Once yearly, lightly sand any rough spots and apply food-grade mineral oil to benches and interior walls. This prevents cracking and keeps wood looking fresh.
Building an infrared sauna home sanctuary requires careful planning around electrical safety, proper ventilation, and moisture management. These details separate a sauna that delivers years of reliable wellness benefits from one that develops problems quickly.
Frequently Asked Questions
Is it possible to build your own infrared sauna?
Yes, you can build your own infrared sauna home sanctuary if you have basic carpentry skills, access to tools, and understand electrical safety. A DIY build gives you complete control over dimensions, materials, and heater placement. However, an infrared sauna kit from a trusted manufacturer like Thermo Plunge Recovery Systems eliminates guesswork on component compatibility and comes with pre-tested systems, reducing installation time and the risk of costly mistakes.
Is it cheaper to build your own sauna or buy a prefabricated infrared sauna kit?
Building from scratch can cost less in materials, but factor in labour, tools you may need to purchase, and time. A quality infrared sauna kit arrives pre-engineered with matched components, professional-grade heaters, and warranty support. The Infrared Sauna 2-Person Premium Home Spa at $3,999.95 includes low-EMF technology, tourmaline foot warmers, and chromotherapy, features that would cost significantly more to source and assemble separately while meeting safety standards.
What materials do you need to build an infrared sauna?
Essential materials include cedar or hemlock wood for framing and cladding, mineral wool or foam insulation, infrared heater panels (far infrared or near infrared), electrical wiring rated for the circuit load, a thermostat and temperature control system, a door with proper clearance, ventilation ducting, and sealants to manage moisture. You'll also need benches, hardware, and safety components like circuit breakers and ground-fault protection to meet electrical codes.
How do you make a sauna area feel like a home sanctuary?
Create ambience by adding chromotherapy lighting (colour therapy), incorporating natural wood finishes, ensuring comfortable seating with proper back support, and installing soft lighting controls. Add aromatherapy elements like salt crystal bricks or essential oil diffusers. Design the space with privacy in mind, consider location away from high-traffic areas. The Infrared Sauna 2-Person Premium Home Spa includes 7-colour light therapy and salt crystal bricks specifically designed to elevate your wellness retreat experience at home.