

How to Set Up a Home Cold Plunge Station
Last Updated: October 26, 2026
Quick Summary
A home cold plunge station combines a tub, chiller, and proper electrical setup in a location with adequate space and drainage. Choose a spot that can support the filled tub's weight, install a dedicated electrical circuit with GFCI protection, and connect the chiller with hoses that circulate water down to 39°F.
- A filled 100-gallon tub weighs over 800 pounds, so verify your floor or foundation can support the load
- Install a dedicated electrical circuit with weatherproof outdoor-rated outlets and GFCI protection for safety
- Position the chiller at least 6 inches from walls on all sides to allow proper airflow and prevent overheating
- Test all hose connections by running the chiller for 15 minutes before filling the tub completely
- Never place a tub directly on grass or soil; use a concrete pad, gravel bed, or rubber matting instead
Table of Contents
- Assess Your Space and Choose Your Setup Location
- Select and Prepare Your Cold Plunge Tub
- Understanding Cold Plunge Chiller Setup
- Build or Assemble Your DIY Cold Plunge Foundation
- Cold Plunge Water Maintenance and Treatment
- Cold Plunge Safety at Home and Best Practices
- Commissioning Your Home Cold Plunge Station
- Frequently Asked Questions
Assess Your Space and Choose Your Setup Location
Setting up a home cold plunge station starts with choosing the right location. Your space determines whether the setup works smoothly or creates headaches down the road. This section gives you the numbers to plan a safe, practical installation.
Measure the footprint and access clearance
If the tub is indoors, measure doorways and stairwells before delivery. A filled tub cannot be moved, and many portable tubs ship folded but still need a clear path to the final spot.
Estimate filled weight and check floor loading
- Concrete slab: Generally fine for portable tubs; verify there are no cracks or hollow spots.
- Wood deck: Confirm the deck was built for a hot tub or similar point load. A common pattern is to double up joists under the tub footprint or add blocking between joists.
- Upper floors: Avoid placing a large filled tub on a second floor unless a structural professional confirms the load path. Even a 100-gallon tub adds over 800 pounds.
- Ground level: Use a concrete pad, gravel bed, or rubber matting over compacted soil. Never place a tub directly on grass or soil, water pools underneath, the ground settles unevenly, and the tub eventually cracks.
Plan for power, drainage, and weather
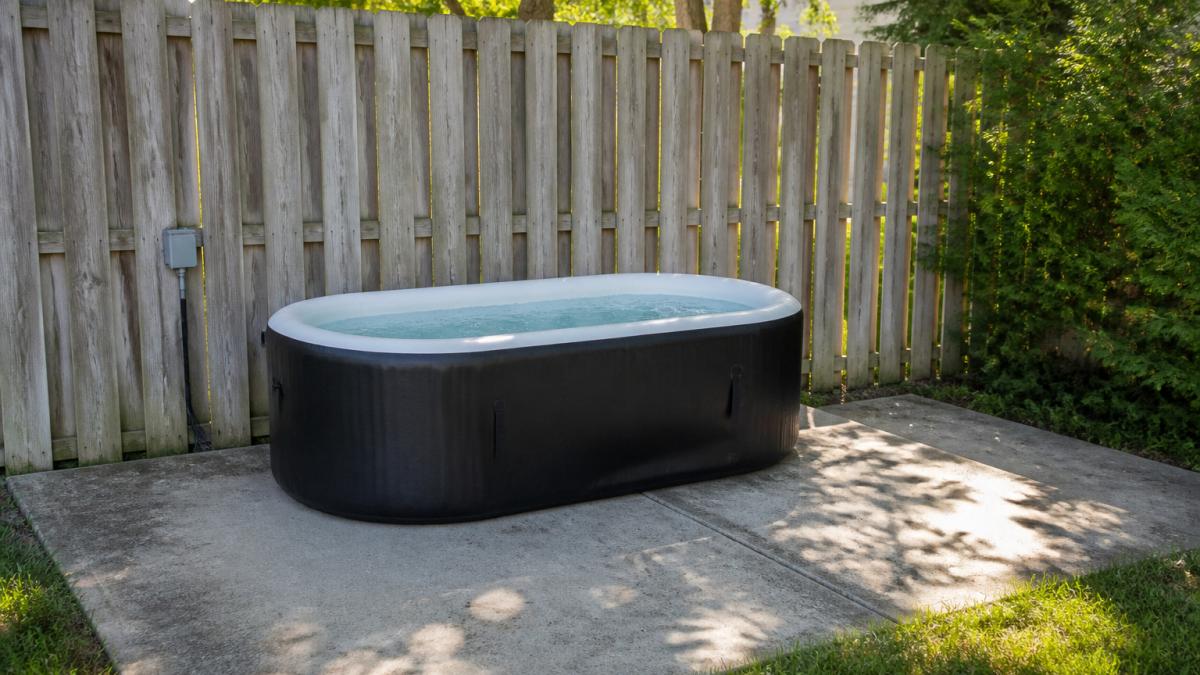
At Thermo Plunge Recovery Systems, we recommend testing your chosen spot before committing. Place the empty tub in position for a few days. Walk around it, check water flow patterns, and verify the electrical setup works as planned. This trial run catches issues early.
Select and Prepare Your Cold Plunge Tub
Tubs come in three main categories:
- Portable tubs: Lightweight, foldable, and easy to store. The Ice Bath Tub - Portable Cold Plunge for Recovery is foldable and easy to store.
- Inflatable tubs: The Upgrade XL Ice Bath Tub - Portable Cold Plunge for Athletes has a 160-gallon capacity and seating capacity for two people.
Understanding Cold Plunge Chiller Setup
A water chiller is the heart of your home cold plunge station. It maintains consistent temperature without relying on ice, which requires constant replacement and attention. Setup is straightforward, but electrical safety and weatherproofing are where most home installations go wrong, and where most guides stay silent.

How a chiller works
The Water Chiller - 1/3 HP Ice Bath Cold Plunge cools water down to 39°F and includes a built-in filter and timer. It works with any tub.

Electrical requirements and GFCI protection
- Dedicated circuit: Avoid sharing a circuit with high-draw appliances. A chiller running continuously draws steady current.
- Weatherproof connections: Outdoors, use an outdoor-rated outlet with a while-in-use cover. Keep the chiller's power cord away from water and off the ground.
- Cord protection: Never run extension cords across wet ground or through standing water. If you need more reach, use a properly rated outdoor extension cord with GFCI protection at the source.
- Separation from water: Position the chiller so its electrical connections are higher than the tub's water line and away from splash zones.
Hose connections and circulation
Connect the inlet hose to the tub's drain or a submersible pump. Connect the outlet hose back into the tub above the water line. This circulation pattern keeps water moving and temperature consistent. Use hose clamps to prevent leaks. Test all connections before filling the tub completely: run the chiller for 15 minutes and check for drips around fittings. Tighten any loose connections immediately.
Placement and ventilation
Position the chiller close to your tub to minimize hose runs. Keep it in a shaded area if possible, direct sun makes it work harder. Chillers generate heat as they cool water, so allow airflow around the unit to prevent overheating. A common pattern is to leave at least 6 inches of clearance on all sides and keep the vents unobstructed. Indoors, ensure the space is ventilated so heat doesn't build up.
First-run checklist for the chiller
If the chiller shows an error code or fails to cool, check the manual for common causes, low water flow, blocked filter, or insufficient ventilation are frequent culprits. Address these before your first session.
Chillers are the core component of a home cold plunge station, and proper setup requires attention to electrical safety, hose connections, and placement.
| Component | Specification | Note |
|---|---|---|
| Temperature | Down to 39°F | Maintains consistent cooling without ice |
| Built-in features | Filter and timer | Included with chiller unit |
| Electrical circuit | Dedicated circuit | Avoid sharing with high-draw appliances |
| Clearance around chiller | At least 6 inches | On all sides for airflow |
| Hose connection test | Run 15 minutes | Check for drips before full fill |
| Outdoor outlet | While-in-use cover | Required for weatherproof connections |
| Chiller placement | Close to tub | Minimizes hose runs and heat loss |
Build or Assemble Your DIY Cold Plunge Foundation
Once your foundation is solid, your tub won't shift during use. This stability matters when people are moving in and out of the water.
Cold Plunge Water Maintenance and Treatment
The Water Chiller - 1/3 HP Ice Bath Cold Plunge includes a built-in filter.
For detailed guidance on water hygiene protocols and advanced filtration, learn how to maintain ice bath water hygiene with step-by-step protocols. For specific filtration system recommendations, explore water filters designed for cold plunge systems.
Ice Bath Tub – Portable Cold Plunge for Recovery →
Cold Plunge Safety at Home and Best Practices
Safety guidelines for cold plunge use:
For comprehensive guidance on safe cold plunge practices and best practices, explore cold plunge therapy at home with benefits, setup, and beginner guidance.
Commissioning Your Home Cold Plunge Station
Follow this checklist:
Your home cold plunge station is now ready. Regular maintenance and safe use will keep it working reliably for years. Start with short sessions, monitor your body's response, and gradually build your cold exposure practice.
Frequently Asked Questions
What equipment do you need to set up a home cold plunge station?
At minimum, you need a cold plunge tub and water to fill it. The [Upgrade XL Ice Bath Tub - Portable Cold Plunge for Athletes](page:2) has a 160-gallon capacity, and the [Water Chiller - 1/3 HP Ice Bath Cold Plunge](page:1) cools water to 39°F and includes a built-in filter and timer.
Do you need a chiller for a home cold plunge?
The Water Chiller - 1/3 HP Ice Bath Cold Plunge works with any tub, includes a built-in filter and timer, and cools water to 39°F.
How do you keep cold plunge water clean?
Regular water maintenance prevents bacteria and algae growth. Use a filtration system to remove debris and contaminants, most quality chillers include built-in filters. Test water quality weekly using basic test strips to monitor pH and sanitiser levels. Drain and refill water every 1-2 weeks depending on use frequency. Clean the tub interior and drain thoroughly before refilling. A thermal cover reduces algae exposure to sunlight and keeps debris out. Proper cold plunge water maintenance ensures safe, hygienic sessions.
How much space do you need for a home cold plunge station?
The Portable Bathtub - Foldable Adult Spa & Ice Bath measures 31.5 × 31.5 × 26.6 inches and has an 87.4-gallon capacity. The Upgrade XL Ice Bath Tub has dimensions of 59.1 × 31.5 × 29.5 inches and a 160-gallon capacity.
