

How to Clean Ice Bath Chiller Pipes Step by Step
Table of Contents
- How to Clean Ice Bath Chiller Pipes Step by Step
- Why Chiller Pipes Get Dirty and Why It Matters
- Safe Cleaning Solutions for Cold Plunge Systems
- What You Will Need Before You Start
- How to Clean Ice Bath Chiller Pipes, Step by Step
- How to Prevent Biofilm in Cold Plunge Systems
- Cold Plunge Chiller Maintenance Schedule
- Booking Your Next Chiller Check or Choosing a Replacement Chiller
- Frequently Asked Questions
How to Clean Ice Bath Chiller Pipes Step by Step
Last Updated: November 3, 2026
Dirty chiller pipes can quietly reduce the performance of a cold plunge. Biofilm, scale and mineral buildup slow the flow of water and can affect how well the chiller cools.
The short answer is simple. Drain the tub, disconnect the chiller, circulate a mild cleaner through the lines, then rinse until the water runs clear. The rest of this guide explains each step and the mistakes to avoid.
Why Chiller Pipes Get Dirty and Why It Matters
Chiller pipes collect buildup because the water inside them stays still between sessions. Warm water, body oils and dust create a film that sticks to the inner walls over time.
Left alone, that film thickens. Flow drops, the chiller works harder, and the water can start to smell or look cloudy.
Signs your chiller pipes need cleaning
Watch for these warning signs:
- Water flow sounds weaker or the pump struggles
- The water looks cloudy even after a fresh fill
- A sour or musty smell returns soon after draining
- The chiller takes longer than usual to reach temperature
If you see any of these, it is time to clean the lines.
Safe Cleaning Solutions for Cold Plunge Systems
Choosing the right cleaner protects your pipes, seals and tubing. A water filter guide for cold plunge systems explains how filtration keeps the lines cleaner between full cleanings. Many people reach for harsh products that do more harm than good.
Cleaners to avoid and why compatibility matters
Avoid bleach, strong acids and abrasive cleaners. They can degrade plastic tubing, damage seals and leave residue that is hard to rinse out.
Always check your chiller's manual before using any product. Some manufacturers list approved cleaners, and using an unapproved one may affect your warranty. Use a mild, non-corrosive cleaner and dilute it as the label directs.
What You Will Need Before You Start
Gather these items before you begin:
Water Chiller – 1/3 HP Ice Bath Cold Plunge →
- A mild, non-corrosive cleaner approved for your system
- A bucket or basin for drained water
- A clean hose or submersible pump to circulate the solution
- Soft brushes sized for your tubing
Set up near a drain or in a spot where water can run off safely. Our guide to setting up a home cold plunge station shows how to arrange the tub and chiller for easy access.
How to Clean Ice Bath Chiller Pipes, Step by Step
Work through these stages in order. Each one builds on the last, and skipping a stage is the most common reason a flush fails to fix the problem.
Before you start: identify what is actually in the pipes
Not every flow problem is dirt. Spend two minutes matching what you see to the likely cause, because each one responds to a different approach.
- Biofilm: a slick, slimy film on the inner walls, often with a musty or sour smell. It regrows quickly if the lines are not fully dried or the water is not treated.
- Scale: a hard, chalky white or grey crust, most common in areas with hard water. It narrows the pipe and reduces flow over time.
- Ordinary debris: loose grit, hair, or plant matter caught near the inlet, filter, or connectors. This usually clears with a rinse and filter clean.
- Cloudy water that returns after a fresh fill: often a sign that contamination is living in the lines rather than the tub.
If the buildup is hard and crusted, a mild cleaner alone may not lift it; plan on a longer soak time and a soft brush. If it is slimy and smells, treat it as biofilm and focus on full removal plus drying.
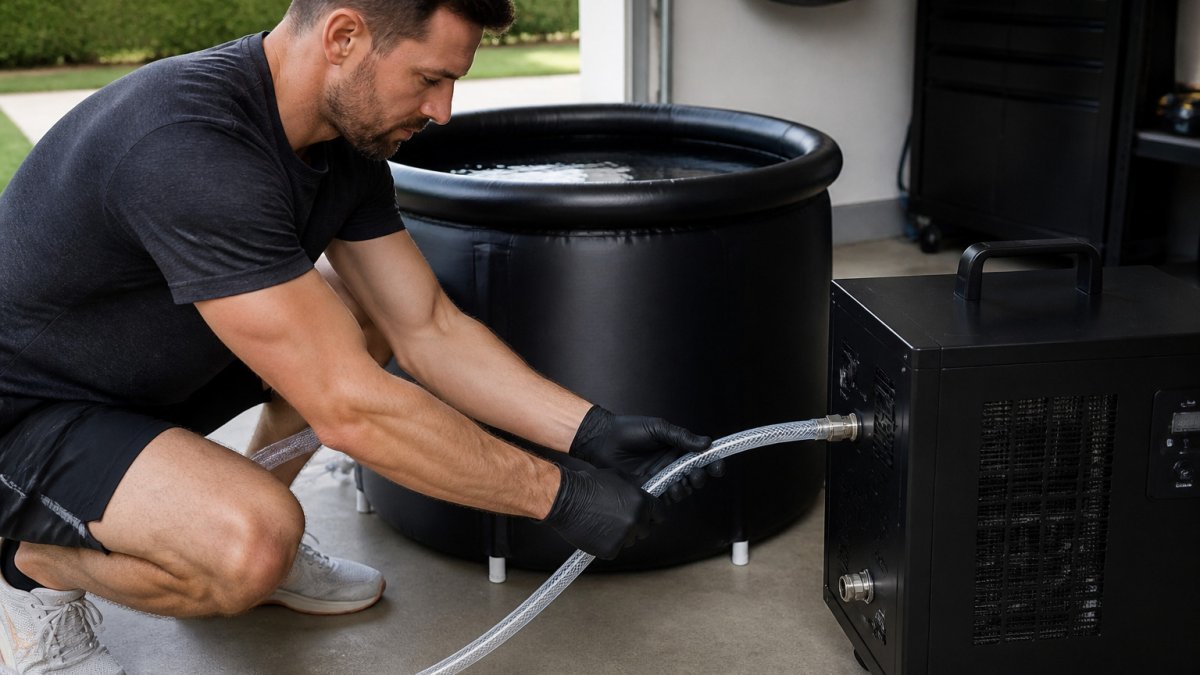
Isolate power and drain the system
- Turn off and unplug the chiller at the wall. Do not rely on a remote or timer to keep it off.
- Drain the tub completely, then remove the chiller's inlet and outlet hoses.
- Pour any remaining water from the lines into your bucket.
- Remove the filter and set it aside for separate cleaning.
Draining first keeps the cleaning solution from being diluted and makes the lines easier to reach. Watch out: never run the chiller dry during a flush, running the pump without water can damage it, and some units will not restart until they have fully cooled.
Check cleaner compatibility before anything touches the lines
Before you mix or pour anything, confirm the cleaner is safe for every material in the loop. A compatibility checklist saves you from a repair bill:
- Tubing: most cold plunge lines use flexible plastic or silicone; strong solvents can soften or cloud them.
- Seals and gaskets: rubber and silicone seals degrade with bleach, strong acids, and some concentrated cleaners.
- Metals: the heat exchanger and fittings may include stainless steel, copper, or aluminum; avoid anything corrosive to those metals.
- Pump internals: impellers and housings are often plastic and sensitive to abrasives.
Check your chiller's manual for approved cleaners, and never mix two cleaners together, combining products can create fumes or a corrosive solution. Use a mild, non-corrosive cleaner and dilute it exactly as the label directs. If the manual lists an approved product, use that one; using an unapproved cleaner may affect your warranty.
Circulate the cleaning solution
- Mix your cleaner at the strength on its label.
- Connect the hoses into a loop so the solution can circulate through the chiller and back.
- Run the solution through the lines for the time the label recommends. For light biofilm, a shorter cycle is often enough; for scale or a heavy film, use the longer end of the label range.
- Watch the return flow. A weak or sputtering return usually means air in the loop or a partial blockage, stop and check the connections before continuing.
Flush and confirm the residue is gone
- Drain the cleaning solution into your bucket.
- Flush with clean water until no soap, suds, or odour remains. Run at least one full flush cycle, then a second short one.
- Confirm the rinse by catching a little of the final flush water in a clear container, it should be clear and odour-free.
- Refill the tub and run a short cycle to confirm water flows freely and the chiller reaches temperature normally.
Watch out: if the final rinse water still smells or foams, do not refill and use the tub, repeat the flush until it runs clean.
Reassemble and check for leaks
Reconnect the hoses, refit the cleaned filter, and refill the tub. Run the chiller for a few minutes and check every connection for weeping or drips. A small leak after a flush is usually a loose fitting or a seal that was disturbed during disconnection; tighten gently and recheck before leaving the system running.
How to Prevent Biofilm in Cold Plunge Systems
Biofilm returns fastest when water sits still and warm. The goal is not a single deep clean but a routine that keeps the lines hostile to growth between cleanings.
Why biofilm keeps coming back
Biofilm is a layer of microorganisms that sticks to surfaces and shields itself with a slimy matrix. Once it establishes in the lines, a quick rinse will not remove it, the matrix has to be broken down and flushed out. That is why a tub can look clean while the pipes still smell musty. The practical lesson is to prevent the film from forming in the first place and to dry the lines fully whenever the system sits idle.
Water Chiller – 1/3 HP Ice Bath Cold Plunge →
Habits that actually slow regrowth
- Drain and refill on a schedule rather than waiting for the water to look cloudy. Cloudiness is a late sign.
- Rinse the lines after each heavy-use week, especially if several people use the tub.
- Keep the filter clean so debris does not reach the pipes and feed the film.
- Dry the system fully during long breaks. Store it with the water drained and the hoses disconnected so air can move through the lines.
Tune the schedule to your use and water
A generic monthly flush is a starting point, not a rule. Adjust it to your conditions:
- Daily use or multiple bathers: flush more often, and shorten the interval between water changes.
- Hard water: scale builds faster, so plan on more frequent flushes and watch for chalky residue at the connectors.
- Warm rooms or long idle periods: growth speeds up in warmth and still water; dry the lines after use.
- Light use with good filtration: you can often stretch the interval, but check the filter weekly regardless.
When in doubt, follow the manufacturer's guidance for your model, it overrides any general schedule.
Troubleshooting after cleaning
If problems persist after a thorough flush, work through these checks before reaching for more chemicals:
- Odour that returns quickly: biofilm was not fully removed, or the lines were not dried. Repeat the flush and dry the system fully.
- Low or sputtering flow: air in the loop, a loose connection, or a partial blockage. Recheck the hose loop and the filter first.
- Cloudy water after a fresh fill: contamination is likely still in the lines or the filter was not cleaned. Re-clean both.
- Leaks after reassembly: usually a loose fitting or a disturbed seal. Tighten gently and recheck.
Watch out: if repeated cleaning does not fix the problem, more cleaner is not the answer, persistent issues usually point to a mechanical fault or a cleaning step that was skipped.
Cold Plunge Chiller Maintenance Schedule
A steady routine keeps the chiller running well. Here is a practical schedule:
| Task | How Often | Why It Matters |
|---|---|---|
| Check the filter | Weekly | Stops debris from reaching the pipes |
| Replace the water | Every few weeks | Limits mineral and bacterial buildup |
| Flush the lines | Monthly or after heavy use | Clears biofilm and scale |
| Full cleaning | Every 3 to 6 months | Restores full flow and cooling |
Adjust the schedule if you use the tub daily or live in an area with hard water. For a broader routine, see our guide to cleaning home recovery equipment.
Booking Your Next Chiller Check or Choosing a Replacement Chiller
If your pipes stay cloudy, flow stays weak, or the chiller struggles even after a thorough flush, the unit may need a professional check or replacement. Our 1/3 HP Water Chiller for Ice Bath Cold Plunge cools water to 39°F, works with any tub, and includes a built-in filter and timer to make upkeep easier. At $999.95, it is a solid choice when your current unit no longer keeps up.

Frequently Asked Questions
How often should you clean chiller tubes?
Clean the chiller pipes whenever you notice cloudy water, odour, or slime, and plan a routine flush at regular intervals based on how often you use the tub and how often you replace the water. Frequent users who plunge daily and keep the water in the tub for long periods will need to clean the lines more often than occasional users. Keep a simple log of water changes and flushes so you can spot when the schedule needs tightening. Always follow the chiller's manufacturer instructions for the recommended interval, since models differ in tubing and filter design.
Can I use vinegar to clean my cold plunge chiller pipes?
Diluted white vinegar is a mild, non-corrosive option that many owners use to loosen light mineral scale and buildup in cold plunge lines. Use a low concentration, circulate it for a limited time, and then flush thoroughly with clean water so no residue remains. Avoid stronger acids and never mix vinegar with bleach or other cleaners, since that can release harmful gases. Check your chiller's manual before using any acid, because some components may not tolerate it.
Is it safe to use hydrogen peroxide in a cold plunge system?
Hydrogen peroxide can be used as a disinfectant in diluted form, but it is not a cure-all and its compatibility depends on the materials in your chiller and tub. Use the lowest effective concentration, run it briefly, and rinse the system completely afterward to prevent residue from reaching your skin. Confirm with the manufacturer that the chiller's tubing and seals can handle peroxide before using it. Never combine it with vinegar or other chemicals in the same cycle.
How do I prevent biofilm from returning in my cold plunge chiller?
Prevent biofilm by keeping the water clean from the start, using the filter as designed, and replacing or cleaning the filter on schedule. Rinse the tub and chiller lines after each cleaning cycle and avoid leaving standing water in the lines when the unit is not in use. Changing the water on a regular schedule and keeping the tub covered when not in use also limits the organic matter that feeds biofilm growth.
