

How to Design a Home Recovery Room: 7-Step Guide
Table of Contents
- Start With Purpose: Define Your Recovery Room Goals
- Recovery Room Essentials: What to Include and What to Skip
- Small Home Recovery Room Layout: Space Planning That Works
- Home Recovery Room Lighting: Zones, Warmth, and Control
- Infrared Sauna and Ice Bath Setup: The Core of Your Recovery Zone
- Budget and Phased Purchasing: Build Your Home Recovery Room in Stages
- Safety, Maintenance, and Accessibility for Your Home Recovery Room
- Frequently Asked Questions
Last Updated: October 19, 2026
Start With Purpose: Define Your Recovery Room Goals
A home recovery room is a dedicated space designed for rest, repair, and stress relief after training or a long day.
Most people want one of three things:
- Faster muscle recovery after hard workouts
- Better sleep and lower stress
- A calm space for stretching, breathwork, or meditation
Write your top goal down. Then pick a second. A room built around two clear goals stays focused.
Think about who uses the space, too. A competitive athlete needs heat and cold therapy. A busy parent may just want quiet and soft light.
Recovery Room Essentials: What to Include and What to Skip
The essentials for a recovery room are a heat source, a cold source, a soft surface, good air, and controllable light. Everything else is optional. Get these five right and the room works.
Start with what earns its place:
- A cold option. A portable ice bath tub or cold plunge is the core of most recovery spaces.
- A heat option. An infrared sauna, sauna blanket, or red light therapy pad covers heat and light therapy.
- A comfortable surface. A mat, a low chair, or a floor cushion for stretching and rest.
What to skip: bulky gym machines, a full weight rack, and decorative clutter. Recovery rooms work best when they feel calm. Save the heavy lifting for the gym.

Small Home Recovery Room Layout: Space Planning That Works
A small recovery room works when you plan the layout around movement, not furniture. You need clear floor space to step in and out of water safely.
Try this simple layout for a compact room:
- Put the cold plunge and sauna along one wall.
- Keep a dry mat and towel zone in front of them.
- Place seating and lighting in the remaining corner.
- Leave a clear path to the door at all times.
For a multipurpose room, use zones instead of walls. A corner becomes the cold zone, a nook becomes the reading and breathwork spot, and a folding screen adds privacy without a full renovation.

Foldable gear is your friend here.
Home Recovery Room Lighting: Zones, Warmth, and Control
Home recovery room lighting should do two jobs: calm you down and let you see safely.
Plan three zones:
- Ambient zone. Warm, low light for relaxation and breathwork.
- Task zone. A brighter light near the plunge and sauna for safe entry and cleaning.
- Accent zone. A small lamp or candle-style light for a calming atmosphere.
Choose warm bulbs and add dimmers where you can. Adjustable lighting lets the same room shift from an evening wind-down space to a practical setup area.
Pair the light with a warm neutral palette and natural materials. Wood, linen, and stone keep the room grounded.
Infrared Sauna and Ice Bath Setup: The Core of Your Recovery Zone
The infrared sauna and ice bath setup is the heart of a recovery zone. Get the placement right and the room works for years. Get it wrong and you fight moisture, heat, and cramped space every day.
Red Light Therapy Pad – Full-Body Infrared Healing Wrap →

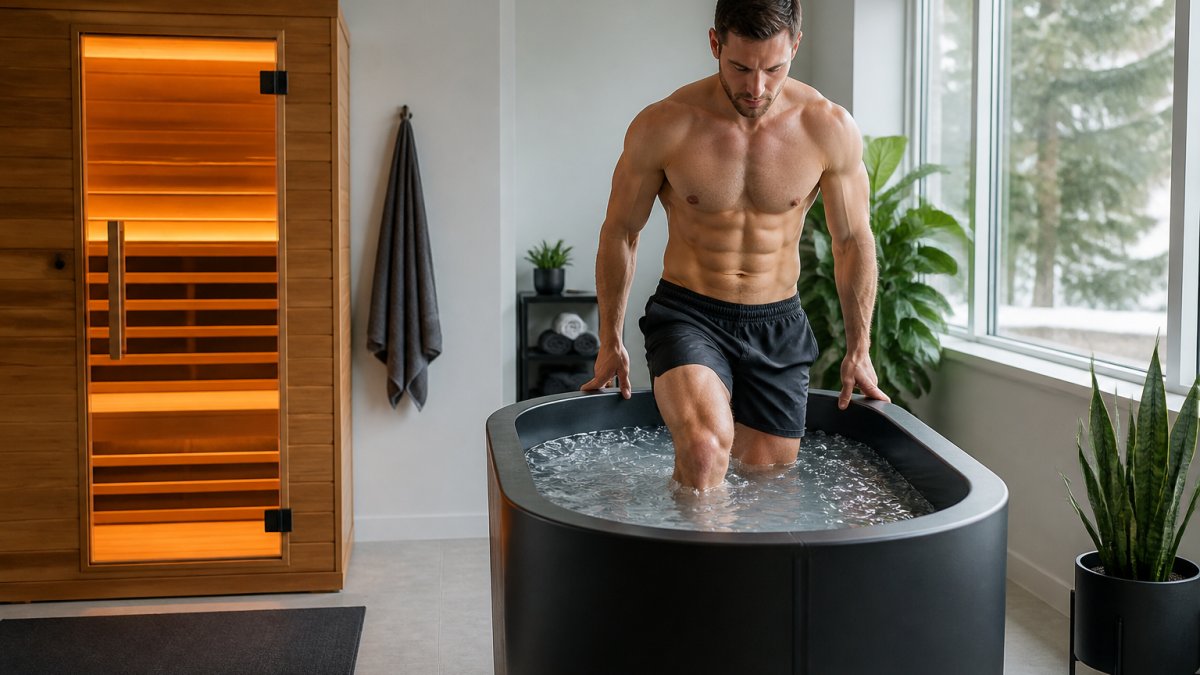
Here is how we would set it up:
- Give each unit its own footprint. Leave room to open doors, step in, and step out safely.
- Keep water and heat apart. Place the plunge and sauna with a dry gap between them.
- Plan drainage and power first. Know where water goes and where units plug in before delivery.
- Add non-slip flooring. Wet feet on smooth floors cause falls.
Our 2-person infrared sauna fits neatly against a wall and pairs well with a compact cold plunge. For tighter rooms, a red light therapy pad adds targeted heat and light therapy without taking floor space.
Budget and Phased Purchasing: Build Your Home Recovery Room in Stages
You do not need to buy everything at once. A phased plan spreads the cost and lets you test what you actually use. Most guides stop at "start small." This one gives you real ranges so you can plan like a project, not a wish list.
What things actually cost
| Item | Typical range | Notes |
|---|---|---|
| Portable ice bath tub (no chiller) | $80-$300 | Cheapest entry point; you add ice or frozen bottles |
| Cold plunge with chiller | $1,200-$5,000+ | Chiller adds cost and needs power and drainage |
| Infrared sauna, 1-2 person | $1,500-$5,000 | Low-EMF and larger units push toward the top |
| Sauna blanket | $300-$700 | No installation; folds away |
| Red light therapy pad | $200-$1,500 | Full-body panels cost more than pads |
| Non-slip flooring or matting | $2-$8 per sq ft | Rubber or textured tile |
| Lighting and dimmers | $150-$600 | Depends on zone count and fixtures |
| Exhaust fan and dehumidifier | $150-$500 | Sized to room volume |
| Dedicated electrical circuit | $500-$2,000 | Licensed electrician; permit may add cost |
| Drain tie-in or pump | $100-$1,500 | Pump is the low end; new drain line is high |
A four-phase plan
- Phase one: the shell. Flooring, lighting, ventilation, storage, and a mat. This makes the room safe and usable before any therapy gear arrives.
- Phase two: cold. Start with a portable tub and ice, or a tub with a chiller if you know you will commit. Cold is usually the cheapest core therapy to test.
- Phase three: heat and light. Add a sauna blanket or red light pad first, then an infrared sauna once the routine holds.
- Phase four: comfort. Décor, plants, extra seating, and better towels. Optional, and the easiest place to overspend.
Where to spend and where to save
Spend on safety and infrastructure first: electrical, drainage, ventilation, and non-slip flooring. These are hard to retrofit and cheap relative to the gear they protect. Save on décor and on the biggest unit until you have proven the habit. A large sauna in an untested room becomes an expensive storage box.
Safety, Maintenance, and Accessibility for Your Home Recovery Room
Safety and upkeep decide whether a recovery room stays useful. Plan for water, heat, power, and easy cleaning from day one. Then make the room work for every body that uses it. This is the section most guides skip, and it is the one that keeps a home installation from becoming a liability.
Electrical and power
Cold plunges with chillers and infrared saunas draw serious current. A two-person infrared sauna often needs a dedicated 240-volt circuit. Do not assume an existing outlet will carry the load. Have a licensed electrician confirm the circuit, install ground-fault circuit interrupter (GFCI) protection anywhere water is present, and keep all receptacles at least a few feet from the tub edge.
Plumbing, drainage, and moisture
A plunge tub holds 60 to 100 gallons, and emptying it by bucket is a chore you will stop doing. Plan a drain path before the tub arrives. Options, in order of cost and effort:
- Floor drain or utility sink nearby. Best case. A plumber can tie a tub drain into an existing line.
- Submersible pump and hose. A small pump moves water to a sink, shower, or exterior drain in minutes.
- Garden hose siphon. Cheapest, slowest, and only works if the tub sits above the drain point.
Moisture is the quiet killer. A sauna in a sealed closet and a plunge in a carpeted spare room both breed mold. Run a bathroom-style exhaust fan rated for the room's square footage, keep a hygrometer on the wall, and target indoor relative humidity under about 60 percent. A small dehumidifier is cheap insurance. Never seal a sauna into a room without ventilation; follow the manufacturer's clearance requirements for walls, ceilings, and combustibles.
Heat safety and clearances
Infrared saunas run cooler than traditional ones but still need breathing room. Keep the manufacturer's minimum clearance from walls and ceilings, never stack towels or store gear on top of the unit, and keep the door unobstructed. If you feel dizzy, lightheaded, or overheated, step out and cool down. Anyone who is pregnant, has cardiovascular conditions, or takes medications that affect sweating or blood pressure should talk to a health care provider before regular sauna or cold exposure.
Accessibility and inclusive design
A recovery room should work for a tired body after training and for a household member with limited mobility. Build in:
- Clear transfer space. At least 36 inches of clear floor beside the tub and sauna door so a walker, cane, or wheelchair can approach.
- Grab bars and a stable seat. A wall-mounted bar near the tub and a bench for drying off reduce falls.
- Reachable controls. Timers, thermostats, and light switches at seated height, not behind the unit.
- Non-slip surfaces. Textured tile or rubber matting in the wet zone, and a bath mat at every step-out point.
A simple maintenance schedule
- After each plunge: skim debris, check water clarity, and dry the floor.
- Weekly: test and adjust water chemistry, wipe the tub shell, and vacuum the sauna vents.
- Monthly: clean or replace the plunge filter, wipe down the red light therapy pad, and check GFCI test buttons.
- Quarterly: inspect cords and plugs for wear, check humidity readings, and clear dust from the sauna's heater area.
A calm, well-kept room invites you back. That routine is what turns gear into results.
Frequently Asked Questions
What should you put in a home recovery room?
Start with the equipment you will actually use several times a week, such as a cold plunge tub, an infrared sauna, or a red light therapy pad. Add comfortable seating, non-slip flooring, a towel and water station, and storage for small items. Lighting, ventilation, and temperature control matter as much as the gear because they decide whether the room feels restorative or stressful. Build around your main recovery routine first, then add extras as your budget allows.
How much space do you need for a home recovery room?
It depends on which equipment you choose. A compact ice bath tub and a red light therapy pad can fit in a corner of a spare bedroom or apartment, while a two-person infrared sauna needs a dedicated wall and clearance for the door. Measure the footprint of each unit, add room to move around it safely, and account for ventilation and drainage. In tight spaces, a foldable cold plunge tub and a wearable red light pad let you share one room for multiple recovery methods.
How do you set up a recovery room at home on a budget?
Buy in phases. Begin with one high-use tool, such as a portable cold plunge tub, and add heat therapy or red light later. A foldable ice bath tub and a portable bathtub for hot soaks can share the same floor space. Spend on ventilation, non-slip flooring, and safe electrical access early, since these protect every piece of equipment you add afterward. Track how often you use each item before buying the next.
What lighting is best for a home recovery room?
Use layered, adjustable lighting instead of one bright overhead fixture. Warm dimmable bulbs at eye level create a calming atmosphere for stretching, breathwork, or reading, while brighter task lighting helps during equipment setup and cleanup. Keep light switches and controls within reach from seating and from the cold plunge. If you use a sauna with built-in chromotherapy, treat it as a separate lighting zone so the rest of the room stays calm and low-glare.
Building a recovery room takes planning, but the payoff is a space that helps you train harder and bounce back faster. Thermo Plunge Recovery Systems makes it easier with professional-grade gear built for home use, including free shipping, a 30-day guarantee, and 24/7 support. Start with a portable ice bath or a red light therapy pad, then grow into a full sauna setup as your routine proves itself. Shop Thermo Plunge Recovery Systems and recover smarter at home.